Friday, December 12, 2014


You know, Santa loves savoury too.

A version of this recipe has been circulating within my writer’s group over the years and it is what everyone reaches for when they have a glass of red wine in their other hand.  I think we just call them “Barb’s cheese things” or “those cheddar crisps.” But in The Daily Cookie by Anna Ginsberg, they are listed under January 20 as Cheddar Cheese Cookies. (Of course I peeked at my birth date, and I got Chocolate Ninjabread Cookies...cool.)

When everybody else is making Christmas sweets, serve these with your apĂ©ritifs and trust that they will go as quick as reindeer.


Cheddar Cookies

1 cup unsalted butter, at room temp.
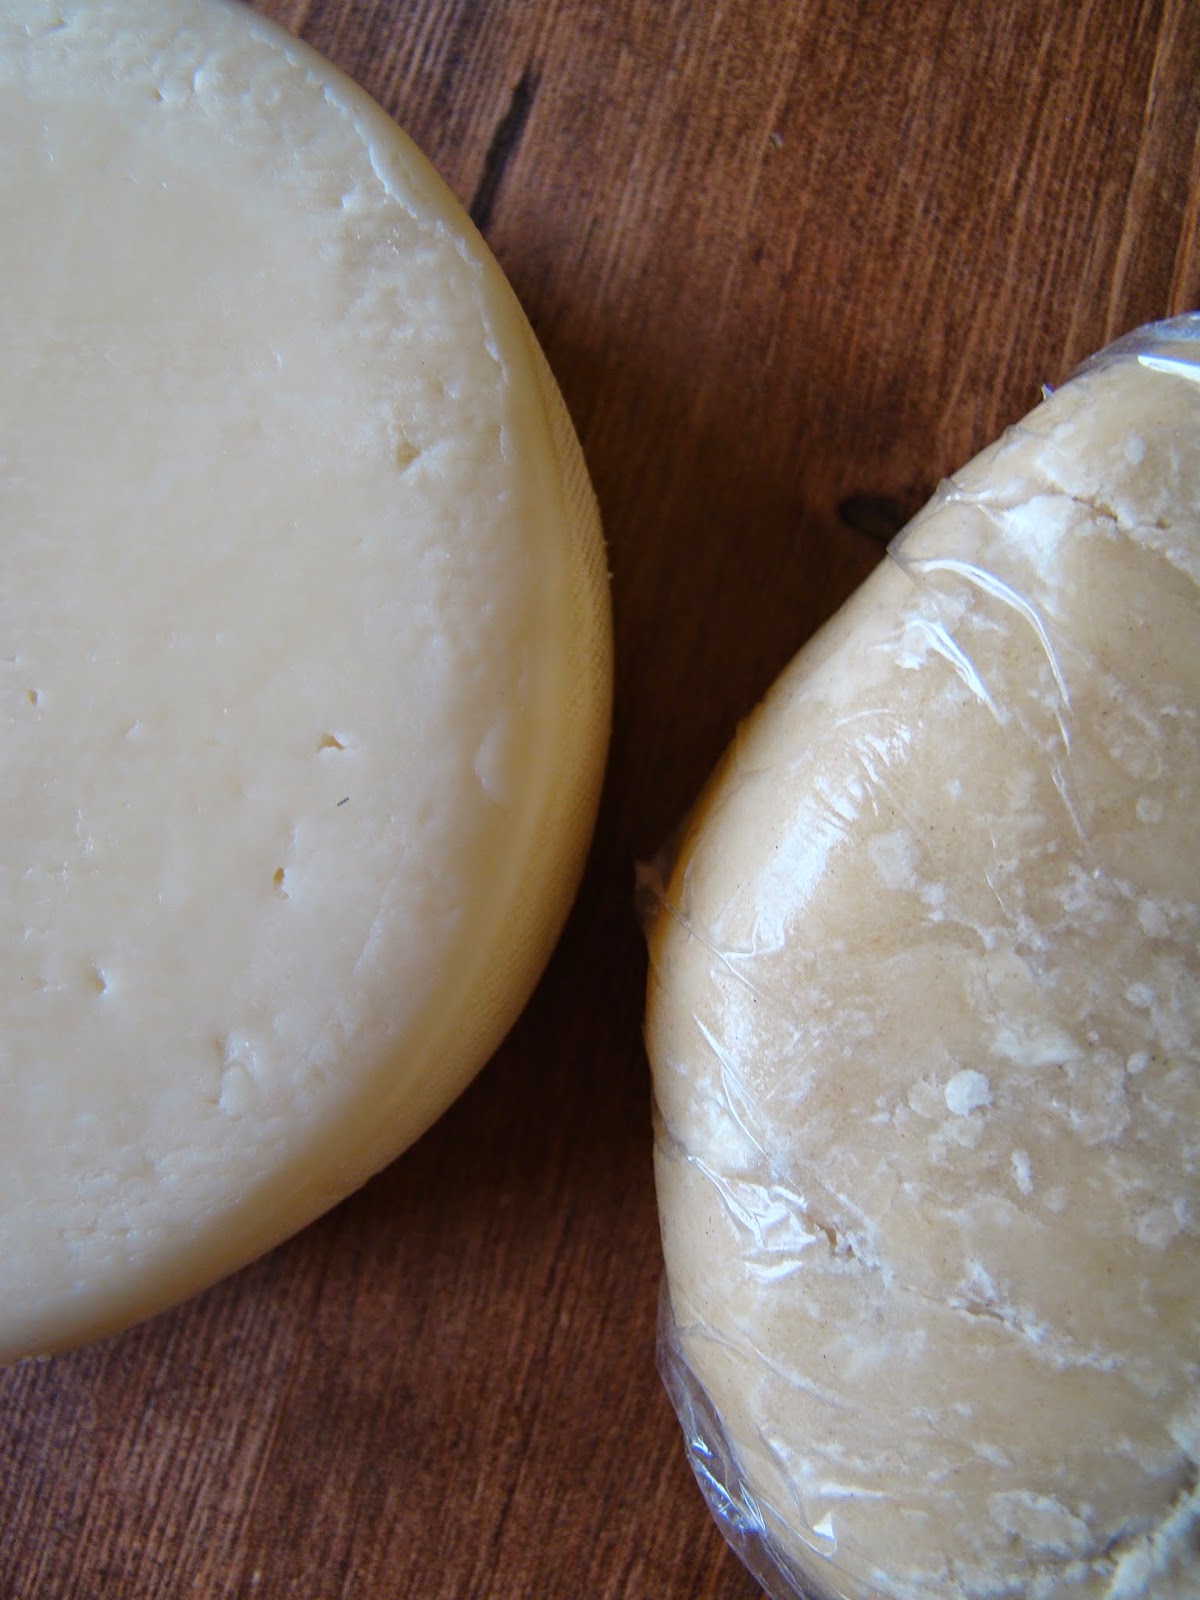
2 cups freshly grated, good-quality sharp Cheddar (please don't use pre-grated cheese for anything)
1/2 tsp sea salt
1/4 tsp cayenne
1/4 tsp garlic powder
2 cups organic all purpose flour
1 cup crispy rice cereal (I use President's Choice brand)
1/4 cup chopped pecans
Smoked paprika, for dusting

Things needed: mini ice-cream scooper (will yield exactly 48 cookies), two baking sheets lined with parchment paper and a mixer.


Preheat oven at 350°F.


© 2014 jordanabananabakes.blogspot.ca 


© 2014 jordanabananabakes.blogspot.ca 


In a large bowl, beat butter until fluffy, then add grated cheese and blend until mixture turns orange. Add salt, cayenne and garlic powder and blend until incorporated. Add flour and cereal and mix.

With your mini- ball scooper, shape dough into 1-inch balls. Place balls 2 inches apart on baking sheets.


© 2014 jordanabananabakes.blogspot.ca 


With a fork, gently make a crisscross pattern on each ball while flattening slightly. Place a not too small pecan piece in the center of each cookie.


© 2014 jordanabananabakes.blogspot.ca 


Bake one sheet at a time for 5 minutes, rotate the sheet, then bake for another 5 to 6 minutes. Transfer to a wire rack to cool completely. Lightly sprinkle cookies with paprika. Enjoy with some excellent wine.


© 2014 jordanabananabakes.blogspot.ca 


Minimally changed from The Daily Cookie by Anna Ginsberg
(Just in case you were wondering, The Daily Cookie lists Almond Ginger Toasts for December 25. These look like thinly sliced but round biscotti, and look very delicate and scrumptious!)
Merry Merry! XO
© 2014

Monday, November 24, 2014


Kale can be intimidating. The only reason I tried kale is because we make cheesy dehydrated kale chips at work. And I loved it ever since. Then I made a tropical smoothie blended with raw kale and the whole family loved it. And then a bag of Ultimate Kale Chips went on sale at my local grocery store. I still loved it. Then I picked up The Book of Kale and Friends by Sharon Hanna and Carol Pope and made Kale Pasta with Rose Sauce- dinner was a hit. And then on a cold day I had a craving for warm bread made easy and was again flipping through The Book of Kale and Friends. Interestingly enough, the no-knead bread recipe in the book had the “friend” rosemary, but there was no kale. I had some kale chip crumbs left over. I added the crumbs instead of rosemary. There is a reason why I’m blogging about it. I am no longer intimidated...bring on the kale!


No Need To Knead Kale Chip Bread

3 cups organic flour
1 1/2 tsp salt
1/4 tsp instant yeast
1/4 cup kale chip crumbs (I used Solar Raw's Better Than Cheddar)
2 Tbsp chopped, fresh herbs (optional)
3 Tbsp olive oil
About 1 to 1 1/2 cups lukewarm water

Things needed: a large enamel, cast-iron, glass or ceramic ovenware with lid, parchment paper, a wooden spoon, kitchen scissors and oven mitts.


In a large bowl, mix flour, salt and yeast together with a whisk.


© 2014 jordanabananabakes.blogspot.ca  


Add the kale crumbs, blend it in the flour and drizzle olive oil around the flour. Add about 1 cup of the water and stir the flour with a wooden spoon, making sure all of the flour is incorporated (if it is a bit too dry, you can add a little more).


© 2014 jordanabananabakes.blogspot.ca  


Cover the dough with plastic wrap and leave the dough in a spot that is warm and undisturbed for 18-24 hours (I started mine early in the morning and left it overnight, to bake fresh the next day).


© 2014 jordanabananabakes.blogspot.ca  


Transfer the risen dough (pictured above) on a large piece of floured parchment paper. Gently fold the sticky dough into a round shape and cut the excess parchment off. Lightly dust the top of the dough with more flour. Cover the dough with a towel and let sit for 30-60 minutes.


© 2014 jordanabananabakes.blogspot.ca  


Make sure your covered pot fits in the oven (you may have to move or remove an oven rack). Leave the empty pot with cover in the oven and set oven to 475°F and leave the pot in for 15 minutes.

Before 15 minutes is up, remove towel from your dough and cut an X with scissors in the middle of the dough. With your oven mitts, carefully remove your hot pot from the oven, place it on the stovetop and remove the lid. Carefully place your dough in the center of the pot and cover. Gently place back in the oven and bake for 30 minutes. Cool bread on a rack for at least 30 minutes. Slice and enjoy with any type of butter or anything you desire.


© 2014 jordanabananabakes.blogspot.ca 


Slightly adapted from Sharon Hanna & Carol Pope's kale cookbook.
Happy Superfooding!
© 2014

Tuesday, October 28, 2014


Happy third year to my blog! We are celebrating with this blender-simple, natural, raw, vegan, gluten-free peanut butter and banana syrup for your anything: from pancakes to fruit dipper. Jordana (who asked for a giant jar of peanut butter for her birthday) can't get enough of this combo. Oh, I just made your week that much nicer? Well, you're welcome :)


Peanut Butter and Banana Blender Syrup 

1 banana (frozen is ok to use)
1/2 cup maple syrup
1/3 cup smooth (just peanuts) peanut butter
1/3 cup to 1/2 cup filtered water (or to desired consistency)
1/8 tsp cinnamon (optional)


Blend together banana,


© 2014 jordanabananabakes.blogspot.ca 


maple syrup,


© 2014 jordanabananabakes.blogspot.ca 


© 2014 jordanabananabakes.blogspot.ca


peanut butter, water (start with 1/3 cup and go from there) and cinnamon until smooth and to your taste. Use immediately. Store leftovers in an air-tight container in the refrigerator for up to one-week. Some discoloration will occur but it will still taste awesome. Drizzle this syrup on pancakes and top it with a teaspoon of jam and you've made PB & J pancakes!


© 2014 jordanabananabakes.blogspot.ca 


J and her PB.


© 2014 jordanabananabakes.blogspot.ca 


Adapted from At Home with Lynn Crawford
© 2014

Monday, September 29, 2014


My daughter was born on (Canadian) Thanksgiving, so the main focus during this holiday is her birthday and organizing her parties ever since. My Thanksgiving became the time to relax after the party planning and worrying how her birthday cake will turn out. Thanksgiving also became a family pot luck, as there are usually birthday leftovers, and my parents would bring food to add on, and my brother and his girls would come to our place and join in the celebration. 

I thought of how laborious and elaborate, much like Christmas, this holiday could be, especially with the turkey (which I have yet to attempt), trimmings, pies and cakes that translate into thankfulness and giving. But as we could see beauty in abundance, we could also see the loveliness in simplicity.

How lovely, I thought, to just serve coffee with some Pumpkin Seed Brittle after a Thanksgiving meal?

Or, how gloriously elaborate, I thought, to top a slice of Pumpkin Pie or Pumpkin Custard with a triangle of this wonderfully sweet brittle?

THANKS for GIVING me the idea, Monday Morning Cooking Club.


Thanksgiving Pumpkin Seed Brittle

1 cup sugar
1/2 cup water
1/2 tsp sea salt
3/4 cup raw pumpkin seeds (or a mix of pumpkin and sunflower)

Things needed: parchment paper, rolling pin, heavy-bottomed saucepan, wooden spoon and a candy thermometer.


Tear off and set aside two large sheets of parchment paper and ready rolling pin near a work surface or wooden cutting board.


© 2014 jordanabananabakes.blogspot.ca 


Place the sugar, water and salt in the saucepan on medium heat and stir to dissolve the sugar. Set the candy thermometer in the liquid and without stirring, cook the syrup until it reaches 116°C/240°F. Take the saucepan off heat and immediately stir in the raw seeds with a wooden spoon. Stir until the mixture becomes grainy and crystallizes (about 3 minutes). Return the pan on medium heat and stir constantly for about 8-10 minutes, until the dry, crystallized sugar melts again and becomes a caramel colour. With care, pour this mixture on top of a parchment paper and cover with the second parchment.


© 2014 jordanabananabakes.blogspot.ca 


Working quickly, use the rolling pin and roll out the brittle into a thin layer. Peel the top sheet of parchment and let brittle cool completely (about 30 minutes to 1 hour).


© 2014 jordanabananabakes.blogspot.ca 


Once cool, cut or break brittle into large pieces. Store in an airtight container for two weeks, separating the pieces with parchment paper to keep from sticking.


© 2014 jordanabananabakes.blogspot.ca 


Serve with coffee or use to decorate pies, custards or crumble and use as ice cream topping.


© 2014 jordanabananabakes.blogspot.ca 

Recipe by Lisa Goldberg straight from Monday Morning Cooking Club cookbook 2013.
What are you thankful for?
© 2014

Wednesday, August 27, 2014


You start with six very ripe pears from the reduced produce section of your grocery store.

That’s it.

Don’t you love one-ingredient recipes?

You can also do this in your oven, like Two Peas and Their Pod have done, minus the sweetener: http://www.twopeasandtheirpod.com/homemade-fruit-leather/

Or if you are in raw mode and have an Excalibur food dehydrator (a shout-out to my friend Natasha!) it is super easy to prepare.  And super yummy! 


Back-To-School Pear Roll-ups

Six ripe pears, washed, halved and cored.

Things needed: A food processor and a horizontal-flow dehydrator.


© 2014 jordanabananabakes.blogspot.ca  


Place pears in a food processor and blend until smooth. Scoop half of the puree (about 1 1/2 cups) and place in the center of Teflex-lined dehydrator tray. Use an offset spatula and spread mixture evenly but not too thinly on the Teflex sheet. Repeat with second tray and place the trays in the center of the dehydrator.


© 2014 jordanabananabakes.blogspot.ca  


Turn dehydrator setting to 57°C (Fruit/Fruit Rolls setting for Excalibur) and dehydrate for 6-8 hours, or until pliable and easy to peel.


© 2014 jordanabananabakes.blogspot.ca  


Cut a sheet of parchment paper to fit the size of the whole peeled fruit roll and place the pear leather on top of the parchment. Roll up the parchment/pear together and use kitchen shears to cut rounds. Store cut-up rounds in a tightly-sealed container or zip-top bags for up to 1 week.


© 2014 jordanabananabakes.blogspot.ca  


© 2014 jordanabananabakes.blogspot.ca  

From Raw Food for Everyone by Alissa Cohen
& thanks for the influence Tiffany xo
© 2014

Sunday, July 27, 2014


For my writer's group, I wanted to showcase summer's brilliant veggies as a main course. I wondered...has anyone come up with Ratatouille Pie? Mais oui! The New York Times published a recipe for a Tarte Cote d'Azur, which I chose among Google's pie collection. The only major alterations I made were reducing the amount of tomatoes and seeding them first before cutting them in cubes. I also used Friulano instead of Fontina cheese. This Ratatouille Pie makes a lovely make-ahead vegetarian summer dish which you can serve warm or cold with a great side salad. I made Cold Strawberry Soup served with yogurt to start, which was also a hit!


© 2014 jordanabananabakes.blogspot.ca 


Ratatouille Pie (makes enough filling for two 9-inch pies)

3 medium Sicilian eggplants, cubed
2 large zucchinis, trimmed and diced
1 large onion, peeled and chopped finely
2 large green peppers, chopped
3 medium tomatoes, seeded and diced
2 large cloves garlic, minced
1 tsp finely chopped fresh thyme
1 bay leaf
sea salt and freshly ground pepper, to taste
1/4 to 1/2 cup olive oil
1/2 cup fresh parsley, coarsely chopped
1 cup pitted and halved Kalamata olives
2 cups grated Friulano cheese, divided
1/2 cup grated Parmesan cheese, divided
1 egg yolk
2 tsp water

Things needed: recipe of your choice for a two-crust pastry (x2) or store bought, and oven-proof casserole.


Preheat oven to 425°F. Heat olive oil (low to medium heat) in a large oven-proof casserole and add eggplant and cook, stirring occasionally, for 5 minutes. Add onion, zucchini, green pepper and continue to cook for another 10 minutes. Add garlic, thyme, bay leaf and salt and pepper. Continue occasionally stirring for another 5 minutes. Add the tomatoes and parsley and cook and stir for another 5 minutes. Place casserole in the oven and bake for 30 minutes. Take out the casserole,stir in olives and bake for another 10 minutes. Take out ratatouille and let stand until thoroughly cold. Discard bay leaf. Turn off oven until ready to bake the pies.


© 2014 jordanabananabakes.blogspot.ca 


Scoop cold ratatouille mixture halfway into each pie crust bottom. Sprinkle 1/4 cup of Parmesan on top of each pie and follow it with 1 cup of grated Friulano on top of each pie. 


© 2014 jordanabananabakes.blogspot.ca 


Sprinkle any leftover ratatouille on top of the cheeses. Cover the pies with the second layers of pastry, trim or tuck under the overlapping edges and seal the edges by fluting or using the tines of a fork to seal. Make sure to poke a few holes on top of the pies with the fork tines to let steam escape. Preheat oven to 375°F. In a small bowl, beat the egg yolk with the water and brush the tops of each pie with the mixture. Bake for 15-20 minutes or until golden brown.


© 2014 jordanabananabakes.blogspot.ca 


Serve warm or cold. I loved it cold!


© 2014 jordanabananabakes.blogspot.ca 

Adapted from Craig Claiborne and Pierre Franey's Recipe from The New York Times © 2014

Monday, June 30, 2014


After a darn good chili, my friend Olive served us Fresh Gingerbread with Lemon Icing by Nigella Lawson for dessert. I couldn't keep it out of my mind. A few weeks later, before our milestone wedding anniversary, I made organic candied lemon peel and put it in a large mason jar for the fridge. A week after that, I pulled out our Nigella Lawson wedding gift mixing bowls from our friends Chris and Betty and made up a recipe that is a branch from Ms. Lawson's original. They were so well-loved in our household that I was urged to bring them for our anniversary trip to Montreal. That is why they are called Anniversary Gingerbread Lemon Peel Bars.


Anniversary Gingerbread Lemon Peel Bars 

2/3 cup unsalted butter
2/3 cup brown sugar, packed
1/2 cup maple syrup
1/3 cup fancy molasses
2 tsp freshly grated ginger
1 tsp ground cinnamon
1 cup milk
2 large organic eggs, room temperature
1 tsp baking soda, dissolved in 2 Tbsp warm water
2 cups organic flour
1 tsp freshly grated organic lemon peel
6 strips (or more) chopped homemade organic lemon peel, wet or drained, divided

For the Lemon Icing:
2 cups icing sugar
2 Tbsp lemon juice
2 Tbsp water (or more)


© 2014 jordanabananabakes.blogspot.ca 


Preheat oven to 350°F. In a medium saucepan, melt butter with sugar, maple syrup, molasses, fresh ginger and cinnamon. Take off heat then whisk in milk, eggs, baking soda + water mix. Set aside.


© 2014 jordanabananabakes.blogspot.ca 


Put flour in a medium mixing bowl. Add freshly grated lemon peel and gently stir. Pour in molasses mix and whisk until well incorporated. Fold in chopped lemon peel. Pour into a greased 8 X 10 pan and bake for 25-35 minutes or firm and skewer or cake tester comes out clean. Do not over bake. While cake cools, make the icing.

Whisk icing sugar with the lemon juice, then gradually add water. Make sure the icing is thick.


© 2014 jordanabananabakes.blogspot.ca 


With a spatula, spread the icing onto cooled cake, top with chopped lemon peel, leave to set and cut into bars. Makes 10-12 delicious bars.


© 2014 jordanabananabakes.blogspot.ca 


© 2014 jordanabananabakes.blogspot.ca 

Inspired by Olive, Nigella, my mixing bowls, organic lemons, dear friends, my sweet girls and the intense and delicate flavours of love and marriage XO. © 2014