Monday, March 11, 2013


March is for the letter M and macaroons. Mmm.

There is a Canadian coffee shop franchise called Second Cup, and one day during an outing, my husband treated me to one of their cookies. This cookie has taken over my thoughts, for the most part of February and ongoing (thanks to M for Marcin). Their Chocolate Dipped Macaroon Cookie is actually supplied by the famous Dufflet pastries of Toronto, and you can see a picture of it here in their drop-down list of gourmet cookies: http://www.dufflet.com/html/freshcollection/gourmet.asp 

I had two recipes to help me create a copy of this addictive cookie. The first recipe was from my cousin M for Marisa, an excellent cook/baker (as is her sister M for Mary Grace) who make delectable, mouth-watering treats, including one for Mini Coconut Macaroon Cupcakes. The Canadian Baker’s recipe for Coconut Almond Macaroons www.canadianbaker.blogspot.ca also gave me another base to work with. Add to it a bit o' luck and some baking experience, my gluten-free Chocolate Macaroon Cookies turned out aMmmazing. You simply must try it and let me know…

Chocolate Dipped Macaroon Cookies  (gluten-free)

1 whole organic egg
1 egg white
2 ½ cups unsweetened desiccated coconut
1 can sweetened condensed milk
½ cup ground almonds (almond meal)
1/3 cup sugar
½ tsp vanilla extract
1 bar good quality dark chocolate (broken) and 1/2 cup good quality milk chocolate nibs


© 2013 jordanabananabakes.blogspot.ca


In a medium bowl, combine coconut and ground almonds. In a separate large mixing bowl, whisk together 1 egg and sugar. 


© 2013 jordanabananabakes.blogspot.ca


Add to it the condensed milk and vanilla extract and whisk until thoroughly blended. Fold in the coconut/almond mixture. Set aside.


© 2013 jordanabananabakes.blogspot.ca


In a separate mixing bowl, beat egg white until stiff. Gently fold egg white in the coconut mixture.

Using a ¼ measuring cup, scoop and level batter and place on prepared cookie sheet lined with parchment paper (it will take some time as the coconut mixture is slightly thick) spacing cookies at least two inches apart (about 6 cookies on each sheet). Bake at 325°F for about 18-20 minutes, (rotating tray during mid-baking and watching closely during the last minutes of baking) until tops and edges of cookies are just lightly golden brown but cookie is mostly white overall (not dark brown). Cool cookies on tray for 5 minutes on a rack, then using a palette knife, slide it slowly under each cookie to loosen and gently lift cookies onto wire racks to completely cool.


© 2013 jordanabananabakes.blogspot.ca


After cookies are cooled, melt dark and milk chocolate together (either by microwave method or double-boiler method) and dip the cookies halfway into the chocolate. Place on a parchment-lined cookie sheet and chill in the refrigerator until the chocolate sets, about 15-20 minutes. Store in a sealed container in the fridge for up to 1 week if it lasts that long. Makes 12 large cookies.


© 2013 jordanabananabakes.blogspot.ca


Thursday, February 7, 2013


One of my favourite cafés in Toronto called La Bohème http://labohemecafe.ca/ sells wrapped Pâte de Fruit de Provence. These melt-in-your-mouth, European-style, sugar-coated fruit confections (I really don’t want to call them jellies, because to me the word conjures up gummy or hard jujube-type candies) are soft, delicious bars of concentrated fruit. And they are my husband’s favourite.

My second inspiration came from the very beautiful book Chocolates and Confections (at home with The Culinary Institute of America) by Peter P. Greweling, which gave me the confidence to tackle my first attempt at simple candy making. (Btw, if you already make jams and jellies at home, it should be even less daunting to make a slab of this sweet). The third facilitator was a candy thermometer that went on sale at Whole Foods for $2.99. I took that as a sign that I had to make it for Marcin. And I’m so happy and proud that I did! My frozen mixed berries from summer turned into dark beauties with a divine texture. If you heart fruit and want to make something different, these are quite special. Happy Valentine's Day, my love.

Pâte de Fruit

2 cups frozen fruit (mix of strawberries, blueberries, blackberries, raspberries and a few pitted cherries)
3 cups sugar
1 box (2 pouches) Certo liquid pectin (at 85ml each, have pouches open and ready to pour)
1 Tbsp lemon juice
½ cup sugar, for coating

Things needed: blender, candy thermometer

© 2013 jordanabananabakes.blogspot.ca

Oil, butter or spray with non-stick cooking spray a 9 x 13 baking pan and line well with plastic wrap, making sure to flatten it to minimize bubbles and wrinkles, especially in the corners of the pan. Do not let excess plastic drape over the pan, but allow it to stay on the inside edge. Set aside.

Cook down frozen fruit in a large saucepan on med. heat, just until its juices are flowing and no ice can be seen. Slightly cool and transfer to a blender, which is then puréed to medium-fine (take care when blending and make sure to slightly vent the lid so steam can escape).

© 2013 jordanabananabakes.blogspot.ca

Put fruit purée and sugar in the same saucepan, which is now on med. high heat. You must stir constantly (to also prevent the bottom of the saucepan from scorching) and cook the purée until the temperature reaches 238°F (the bowl you used for sugar can be where you put the candy thermometer in once the temperature reaches 238°F, or else you will end up putting the thermometer on the counter, when you have to rush to get the boiled purée in its pan).

Once it reaches 238°F, quickly add the pectin and return the mixture to a boil while stirring, for 1 minute.

Stir in lemon juice and take pan off heat (and don't forget to turn off heat).

Quickly pour hot mixture onto prepared pan and sprinkle thin layer of sugar evenly on the top.

© 2013 jordanabananabakes.blogspot.ca

Let pan completely cool (two hours or longer) on a rack.

Turn the pan upside down on a large cutting board to release jelly. Peel off plastic wrap. Sprinkle thin layer of sugar evenly on top.

© 2013 jordanabananabakes.blogspot.ca

Use small cookie cutters or cut into desired pieces and roll each piece in sugar. It is best presented the same day it's made. Extras you can store in an airtight container, between layers of plastic wrap or parchment, in a cool, dry place, but keep in mind the sugars will dissolve. The rest of the batch you can keep all to yourself, or share with those who don't mind sticky, yummy, coloured fingers.

© 2013 jordanabananabakes.blogspot.ca

Tuesday, January 22, 2013


When Dana Moos wrote her introduction to The Art of Breakfast and talked about the varied diets of her inn guests, I wondered if she ever encountered one as diverse as Yanni’s.

In my aim to please, I took up a personal challenge- to alter a new recipe for a vegan, wheat-free and blood type A diet. But perhaps in all my glorious effort to satisfy the sweet buds, our friend Yanni might not be a sweets kind of person at all. Which is o.k., because I am delighted that this recipe surfaced at the right time, when I was looking for a healthy weekend winter breakfast alternative: one that I could prepare the night before, largely portioned (for future visitors), versatile, different and down-home delicious. It’s comfort heaven if you top this breakfast cake with raisins and/or dried cranberries and pure maple syrup! Mrs. Moos’ original recipe contained dairy and is served with rhubarb sauce and vanilla crème (aside from dairy, rhubarb and alcohol-based extracts like liquid vanilla are to be avoided in type A diets, in which case vanilla seeds could be used). But for our friend (and everyone else), I think this cake would also be amazing served with a simple fruit compote, as a breakfast main or along with your buffet of brunch fixings. In the summer, maple syrup and fresh berries alongside would be lovely as well.

Mmm…summer berries! Dreaming of summer during this cold winter day! Dreaming of
Yanni and Kali’s beautiful location in the Muskokas (www.evergreenecoresort.com). Can’t wait to share this with you, dear friends, over coffee and conversation.

Vegan and Wheat-Free Oatmeal Breakfast Cake

1 cup organic canola oil
½ cup honey
¼ cup pure maple syrup
1 tsp black strap molasses
150g organic silken tofu
2 1/2 cups unsweetened almond milk
2 tsp cinnamon
1 ½ tsp salt
6 cups thick-cut organic old-fashioned rolled oats (not quick cook or instant)

For the Berry Compote: Put 2 pints fresh or frozen mixed berries in a saucepan with
½ cup orange juice and cook down at medium heat. Serve on the side.


© 2012 jordanabananabakes.blogspot.ca  

In a bowl, combine oil, honey, maple syrup and molasses. In a large bowl, toss oats with cinnamon and salt. In a large mixing bowl, mash and whisk silken tofu until slightly smooth in texture, then add the oil mixture and whisk together until smooth and well combined. Whisk in almond milk. 


© 2012 jordanabananabakes.blogspot.ca

Add the oats and mix until well incorporated.


© 2012 jordanabananabakes.blogspot.ca


Pour mixture into a greased 9 X 13 glass baking dish and use a spatula to press/spread the mixture gently and evenly throughout the baking dish. Cover (with lid or plastic wrap) and let chill overnight in the fridge.


© 2012 jordanabananabakes.blogspot.ca

Preheat oven to 350°F. Remove baking dish from fridge, uncover and let stand about 15 min. while the oven is preheating.

Bake uncovered for 30-35 minutes, until lightly brown on top. Let cool 20 minutes and cut into squares and serve with raisins and/or dried cranberries with maple syrup and/or berry compote on the side. Store in refrigerator and remains wonderful rewarmed in the microwave.


© 2012 jordanabananabakes.blogspot.ca

Adapted from The Art of Breakfast by Dana Moos

Wednesday, December 12, 2012


I had a Vietnamese friend whose mother was of Dutch heritage. After dinner, they pulled out two hermetic glass jars, one filled with squares of dark Dutch chocolate and the other with crystallized ginger coins. You ate them together or alternating, while sipping hot, black tea. To me, it was a perfectly memorable way to end a meal.

This combination has blended its way into my gingerbread. With semi-sweet chocolate and minced candied ginger, this cake is dense but oh, so moist and delicious. Sprinkled with sugary snow, it is a wonderful, wintry way to celebrate December and the holidays. You can elevate this into a luscious gingerbread latte cake for a special occasion, topping each slice with coffee whipped cream and grated chocolate. Either way it will be savoured, even at its simplest, perhaps after an effortless meal, with some hot, black tea.

Gingerbread Latte Cake

1 ½ sticks unsalted butter, at room temperature
½ cup sugar
½ cup brown sugar
1 tsp ground cinnamon
1 tsp ground ginger
¼ tsp ground cloves
¼ tsp ground allspice
2 large organic eggs, at room temperature
1 circle crystallized ginger, minced
2 ½ cups organic all-purpose flour
½ tsp salt
2 tsp baking powder
1 tsp baking soda
¼ cup molasses
1 cup buttermilk
½ cup mini pure semi-sweet chocolate chips
icing sugar for sprinkling

Coffee Whipped Cream: In a medium bowl, whip 1 cup heavy cream with 1 Tbsp vanilla sugar and 1 tsp instant coffee granules until soft peaks form.

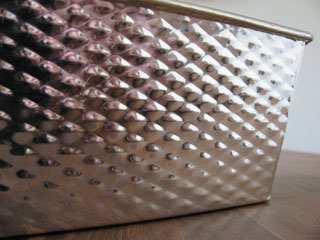
Preheat oven to 350°F. Butter and flour a large loaf or square pan (here I used a 12"/30cm Kaiser loaf pan). With a mixer, whip butter and sugars together until fluffy. 

© 2012 jordanabananabakes.blogspot.ca

Add the four ground spices and beat until just incorporated. Add eggs one at a time, beating well after each addition. 

© 2012 jordanabananabakes.blogspot.ca

Stir in minced candied ginger.


© 2012 jordanabananabakes.blogspot.ca

In a separate bowl, combine flour, salt, baking powder and baking soda. In another bowl, mix molasses and buttermilk together. Add a third of the flour mixture into the butter mixture and stir until incorporated. Then add half the molasses mixture in with the butter mixture, and keep alternating, making sure to stir in between additions and ending with flour. Stir in mini chocolate chips until just combined.

Pour batter into prepared pan and bake for 50 minutes or until a cake tester inserted in the center comes out clean. Cool in pan for 20 minutes then gently slide out of the pan. Sprinkle with icing sugar. Serve slices of warm cake topped with coffee whipped cream and grated chocolate or cocoa.

© 2012 jordanabananabakes.blogspot.ca

© 2012 jordanabananabakes.blogspot.ca

Inspired by a recipe from The Vineyard Kitchen


Monday, November 26, 2012


It’s been a bumpy November. Instead of dreary details, I divulge a blissful alternative: a bar that may perhaps pardon all that is erroneous in the world. Welcome a newly adapted rocky road bar from Alice Mendrich’s (yes, how dare I) glamorous bakebook: Chewy Gooey Crispy Crunchy Melt-in-Your-Mouth Cookies. (www.alicemedrich.com)

These altered bars- they’re not glamorous. To me, they are actually the opposite of Alice’s sophisticated rocky roads. With only a few changes, Alice’s uptown bars morphed into serious heftiness that even look like they can handle tough roads. The colour of the cookie base reminds me of Harley motorcycle tires, oil, black boots, leather… I know I’m among polite company, but I say this to describe it best: these Biker Bars are bad-ass.

Biker Bars

1 ½ stick unsalted butter, melted
1 cup chocolate cookie crumbs
¾ cup graham cracker crumbs
¼ cup sugar
1 cup walnut halves (try to not miss out on this one)
6 Giant Roaster campfire marshmallows, cut in half
(www.campfiremarshmallows.com/products/giant-roasters/)
1 cup good-quality semi-sweet chocolate chips

Line an 8-inch square pan with foil. Preheat oven to 350F. Mix butter with both crumbs and sugar until moist. 


Spread mixture into the lined pan and press firmly and evenly to form the crust. Scatter walnuts, then chocolate chips. 


Bake for 8 minutes, then remove from oven and place giant marshmallow halves (flat side down) on top. Bake for 10 minutes or until the marshmallows are puffy golden brown. 


Set on a rack to cool completely. Lift the ends of the foil and transfer to a cutting board. Cut into 12 bars. Keep in an airtight container for up to a week. 
© 2012 www.jordanabananabakes.blogspot.ca


Tuesday, October 30, 2012


It’s late October and I could be baking anything with apple or pumpkin right now, but I chose bananas. Welcome to Jordana Banana Bakes/Nika Tortilla Travels, featuring the names of our girls who consistently inspire me. Jordana Holiday (now six) was born in October, and how timely as I give blog birth this month. I am eager to share both my kitchen journeys and my real life treks with you.

I love autumn, but as for winter, I love only the first of snows, before the slush, ice and drab set in. I love the winter views, but often while sitting by the warm side of the window. Yes- love the toques, thick coats, holding warm cocoa with mittens and all that, but only for a brief time. You see, I was born on an island, in hot climate, and was not completely winterized growing up. So when December rushes in like a mad woman in the market (and it will soon enough) I do a little internal dance when I see oranges that mound their way above the ubiquitous apples. I'm a locavore, but I'm also a traveller, and it's difficult to overlook those oranges and clementines reminding us of vacation sunsets. Same feeling (if not more so) when I see my favourite, the succulent, ever-sexy yellow-orange mango. And of course the always smiling banana. 

While I very much look forward to baking with the local fruits of the season, banana bread is always comforting, anytime of the year. Topped with a banana chip streusel, this super-moist bread is given an extra wonderful, crunchy, complementary cuddle. 

Jordana Banana Bread with Banana Chip Streusel (Makes 1 loaf)

1 cup organic all-purpose flour
1/2 cup organic whole wheat flour
3/4 cup sugar
1 tsp cinnamon
1 tsp baking soda
1/2 tsp salt
1 cup mashed ripe organic bananas (about 3)
2 large organic eggs
1/2 cup vegetable oil
1/4 cup honey
1/4 cup water

Streusel: Mix together 2 Tbsp golden brown sugar, 2 Tbsp granola and 4 Tbsp crushed banana chips


Preheat oven to 325°F. Butter and flour a large metal loaf pan. Whisk flours, sugar, cinnamon, baking soda and salt in a large bowl. 


In a separate bowl, stir together mashed bananas, eggs, oil, honey and water. Add dry ingredients and stir until just blended (batter will be wet).


Transfer batter to pan. Evenly sprinkle streusel on top (do not press down) and bake until tester inserted into center comes out clean, about 1 hour.


Cool bread in pan for 30 minutes. Turn the pan on its side and gently slide bread out, being careful not to disturb topping. Cool bread right side up. Serve warm or at room temperature. © 2012 www.jordanabananabakes.blogspot.ca


Inspired by a recipe from Bon Appétit.