Saturday, July 20, 2013


36°C.

Too. Hot. To. Bake. 

This recipe is so cool.

I'm sure you have about twenty ladyfingers left over from the last time you made Tiramisu.

I'm sure you have about one pint of vanilla ice cream from the last time you made a crumble.

I'm sure you have about two cups of frozen strawberries from when you went picking with the kids.

And I'm sure you have about one cup of heavy cream left over, from that luxurious pasta dish you made last night.

There you are: No-Cook, No-Bake, No-Fuss, Ice Cream Tiramisu.


Ice Cream Tiramisu

20 Savoiardi or Ladyfinger Biscuits
1 pint (2 cups) vanilla ice cream, melted
2 cups frozen strawberries
1 cup heavy (whipping) cream
2 Tbsp icing sugar (for whipping cream)


Leave ice cream (I had about 2 cups of leftover ice cream in this container) on the kitchen counter until melted (about 30-45 minutes).


© 2013 jordanabananabakes.blogspot.ca


Puree frozen berries in blender until it resembles sorbet in texture.


© 2013 jordanabananabakes.blogspot.ca


Line a 9 X 13 glass baking dish with the biscuits (breaking two or three ladyfingers in half to fit if necessary).

Pour the melted ice cream over ladyfingers. 


© 2013 jordanabananabakes.blogspot.ca


Spoon the berry puree on top and spread evenly over biscuits.


© 2013 jordanabananabakes.blogspot.ca


Cover dish with plastic wrap and refrigerate for 4 hours or overnight. 

Just before serving, using an electric mixer, whip cream with icing sugar until soft peaks form. Serve berry biscuits (now a soft, cakey texture) with a spread or dollop of fresh whipped cream. 


© 2013 jordanabananabakes.blogspot.ca

Recipe adapted from William-Sonoma: Easy Entertaining


Tuesday, June 25, 2013


For our friend's 30th birthday, my girls and I decided to throw an outdoor Pink Party.

Pink dresses, pink hats, with pink food and ambiance of course.

Chocolate Cake with Double Berry Mousse was la pièce de résistance.

It was, as my bookworm daughter would say, “Pinkalicious!” 

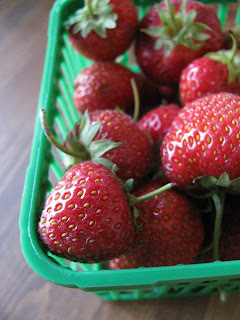
It is a dense, moist chocolate cake, and in the middle, raspberry compote and fresh strawberries folded in whipped cream. It is the most scrumptious introduction into thirty that I could think of.

Thirty can be this delicious! Happy Birthday Lindsey.


© 2013 jordanabananabakes.blogspot.ca


Chocolate Cake with Double Berry Mousse

For the Double Berry Mousse filling:
2 cups fresh raspberries
1/2 cup sugar
2 Tbsp cornstarch
1/4 cup water
1 cup whipping cream
1 Tbsp icing sugar
1 cup fresh strawberries, diced

In a medium pot on medium heat, cook raspberries until it just starts to bubble. Add the sugar and stir to dissolve. In a small bowl, mix cornstarch with water until incorporated, then stir it into the raspberry mixture until thickened. Take off heat, cool about 30 minutes then refrigerate for two hours or until chilled.

Whip cream with icing sugar until stiff. Fold 1/2 to 1 cup of chilled raspberry compote into whipped cream (save leftover raspberry compote for ice cream or more whipped cream mousse for another day's dessert). Fold in diced fresh strawberries. Keep in fridge until ready to fill cake.


© 2013 jordanabananabakes.blogspot.ca


For the Chocolate Cake:
2 cups organic all-purpose flour
1 tsp baking powder
pinch of salt
1/4 tsp baking soda
1/2 cup raw cocoa powder, such as
1 cup sugar
1/2 cup butter
1 cup buttermilk
1 tsp vanilla extract
2 organic eggs

For the Chocolate Frosting:
2 cups whipping cream
8 oz Lindt Piccoli semi-sweet couverture wafers

Preheat oven to 350°F.

Sift dry ingredients in a medium bowl. In a separate large mixing bowl and with an electric mixer, whisk the butter and vanilla together. Whisk in the eggs, one at a time, until incorporated. Add a third of the flour mix into the butter mix and whip for 1 minute, then add 1/2 of the buttermilk and whip for 1 minute, alternating between the flour and buttermilk, ending with the flour mix. Make sure all the flour is scraped from the sides and are incorporated.


© 2013 jordanabananabakes.blogspot.ca


Line two round 9" baking pans with parchment paper. Divide the mixture between the two pans, smoothing out the tops. Bake for 25 minutes or until cake tester comes out clean. Remove from oven and let cool in the pans for 10 minutes, then turn onto a wire rack. Gently remove parchment papers and let cool. 

In the meantime, make the frosting. In a medium saucepan, combine the whipping cream and chocolate. Gently stir over low heat, until chocolate has melted and the mixture has become shiny and smooth. Let cool.

Once the cakes are cooled, place a cake layer on a parchment sheet that is on top of a cookie sheet with sides (to catch the runny icing). Top the first cake layer with the Double Berry Mousse and spread evenly. Place the second chocolate cake layer on top of the mousse. Before pouring the frosting on top of the whole cake, beat it for two minutes, then pour onto the center of the cake and allow it to drip down the sides, making sure it covers the whole top of the cake and the bottom sides. Let frosting set- about 15 minutes. Gently lift cake from parchment, trying not to touch the top of the cake, and place on a decorative cake platter. Top with freshly cut roses (minus the thorns) or other edible flowers.


© 2013 jordanabananabakes.blogspot.ca


© 2013 jordanabananabakes.blogspot.ca

Chocolate Cake adapted from Darina Allen's Forgotten Skills of Cooking

Wednesday, May 29, 2013


I am clearing out my freezer to make room for this summer’s bounty. Fresh rhubarb is now here, but I am determined to use last year’s frozen stash. How about stewed rhubarb? My recipe makes a nice batch, so I decided that half of it would be solely for scooping and eating (maybe one serving with a giant dollop of vanilla yogurt) and the other half would be for the middle layer in a cake. A cheesecake. Rhubarb cheesecake. My seasonal take. 

Rhubarb Cheesecake

For the stewed rhubarb:
3 cups frozen rhubarb
½ cup sugar
2 heaping Tbsp strawberry jam

Cook first 2 ingredients in a pot over medium-high heat, uncovered, for 15-20 minutes until thickened and pulpy. Take off heat and swirl in strawberry jam. Let cool or refrigerate overnight.

For base:
1 cup butter, room temperature
½ cup sugar
1 tsp vanilla
pinch salt
1 egg
1 ¼ cup flour
1 tsp baking powder

For filling:
1 ½ cup cream cheese
300g container ricotta cheese, drained
½ cup sour cream
1 tsp vanilla
2/3 cup sugar
4 eggs
¼ cup cornstarch
2/3 cup melted butter


© 2013 jordanabananabakes.blogspot.ca

To make the base, whip butter and sugar together until creamy. Add vanilla and egg. In a bowl, mix flour, salt and baking powder together, then incorporate into the butter mixture. Spread evenly on a buttered 10-inch spring form pan. Dollop spoonfuls of stewed rhubarb throughout the base- do not spread evenly. Set aside. Preheat oven at 375°F.

 For the filling, whip cheeses and sour cream together, then add the vanilla and sugar. 


© 2013 jordanabananabakes.blogspot.ca


Whisk in eggs one at a time, then mix in cornstarch and melted butter.


© 2013 jordanabananabakes.blogspot.ca


Pour filling on top of the rhubarb, making sure the top of the filling is smooth and even. Bake for one hour. While leaving oven door closed, turn off oven and let the cake sit inside for one more hour. Remove from oven and let cake cool completely on a wire rack before cutting.


© 2013 jordanabananabakes.blogspot.ca


© 2013 jordanabananabakes.blogspot.ca


Inspired by Grandma’s German Cookbook

Tuesday, April 30, 2013


My girls love beans. I love that my girls love beans.

Lentil soup, black bean stew, corn and kidney bean salad...and now roasted garbanzos!

Ingenious really, these delicious little morsels. And it's versatile- from snack to side to soup topping, and can turn into a delightful vegetarian main dish. Throughout the years I have found different recipe variations from parent magazines and even Williams-Sonoma does a deep-fried version with garlic, sea salt and sage. Yum!

My version is baked and seasoned with paprika and cumin. Adding olive-oil-fried garlic and coarse sea salt reminds me of my Aunt Arit’s garlic peanuts (ginisang mani) from the Philippines (which would not be the same if I made it here, because both the peanut and garlic varieties are not available in Canada *sigh*).  But both are full of flavour and so addictive...you might just want to make a double batch!

Roasted Garbanzos with Fried Garlic

1 can (19 oz.) garbanzos, rinsed and drained
1/4 cup olive oil + more for frying garlic
1 tsp paprika
1 tsp cumin
1 tsp coarse sea salt
1/2 tsp freshly ground pepper
3-5 small cloves garlic, unpeeled (or more to taste)

Preheat oven to 400°F.

In a large mixing bowl, combine garbanzos with 1/4 cup olive oil, cumin, paprika, salt and pepper.


© 2013 jordanabananabakes.blogspot.ca

© 2013 jordanabananabakes.blogspot.ca

Spread garbanzos out evenly on a rimmed baking sheet lined with parchment paper and roast for 25 minutes, stirring once or twice until golden.

While the garbanzos are roasting, fry the small garlic cloves on medium-high heat until they turn medium-dark brown and crispy, about 1-2 minutes (If you wish to use large cloves, you may cut the hard bottom part and fry them whole with skin on, which will make them slightly on the crunchy side, not crispy, and fry until golden brown. You may also crush the large cloves using a knife with a wide blade: place your knife flat over the clove and with your palm, press down hard on the side of the blade. The skin is now easy to peel off, and at this point you can take off the skin or leave it on, before adding them to the hot oil).

© 2013 jordanabananabakes.blogspot.ca

Transfer the fried garlic to a paper towel-lined bowl to drain. Once slightly cool, peel off skin.

© 2013 jordanabananabakes.blogspot.ca

Transfer roasted garbanzos to a serving bowl, toss or top with the fried and peeled garlic and serve (as a snack, a side dish, sprinkle on hearty soups such as cauliflower or serve on top of basmati rice, quinoa or couscous for a vegetarian main).


© 2013 jordanabananabakes.blogspot.ca


Monday, March 11, 2013


March is for the letter M and macaroons. Mmm.

There is a Canadian coffee shop franchise called Second Cup, and one day during an outing, my husband treated me to one of their cookies. This cookie has taken over my thoughts, for the most part of February and ongoing (thanks to M for Marcin). Their Chocolate Dipped Macaroon Cookie is actually supplied by the famous Dufflet pastries of Toronto, and you can see a picture of it here in their drop-down list of gourmet cookies: http://www.dufflet.com/html/freshcollection/gourmet.asp 

I had two recipes to help me create a copy of this addictive cookie. The first recipe was from my cousin M for Marisa, an excellent cook/baker (as is her sister M for Mary Grace) who make delectable, mouth-watering treats, including one for Mini Coconut Macaroon Cupcakes. The Canadian Baker’s recipe for Coconut Almond Macaroons www.canadianbaker.blogspot.ca also gave me another base to work with. Add to it a bit o' luck and some baking experience, my gluten-free Chocolate Macaroon Cookies turned out aMmmazing. You simply must try it and let me know…

Chocolate Dipped Macaroon Cookies  (gluten-free)

1 whole organic egg
1 egg white
2 ½ cups unsweetened desiccated coconut
1 can sweetened condensed milk
½ cup ground almonds (almond meal)
1/3 cup sugar
½ tsp vanilla extract
1 bar good quality dark chocolate (broken) and 1/2 cup good quality milk chocolate nibs


© 2013 jordanabananabakes.blogspot.ca


In a medium bowl, combine coconut and ground almonds. In a separate large mixing bowl, whisk together 1 egg and sugar. 


© 2013 jordanabananabakes.blogspot.ca


Add to it the condensed milk and vanilla extract and whisk until thoroughly blended. Fold in the coconut/almond mixture. Set aside.


© 2013 jordanabananabakes.blogspot.ca


In a separate mixing bowl, beat egg white until stiff. Gently fold egg white in the coconut mixture.

Using a ¼ measuring cup, scoop and level batter and place on prepared cookie sheet lined with parchment paper (it will take some time as the coconut mixture is slightly thick) spacing cookies at least two inches apart (about 6 cookies on each sheet). Bake at 325°F for about 18-20 minutes, (rotating tray during mid-baking and watching closely during the last minutes of baking) until tops and edges of cookies are just lightly golden brown but cookie is mostly white overall (not dark brown). Cool cookies on tray for 5 minutes on a rack, then using a palette knife, slide it slowly under each cookie to loosen and gently lift cookies onto wire racks to completely cool.


© 2013 jordanabananabakes.blogspot.ca


After cookies are cooled, melt dark and milk chocolate together (either by microwave method or double-boiler method) and dip the cookies halfway into the chocolate. Place on a parchment-lined cookie sheet and chill in the refrigerator until the chocolate sets, about 15-20 minutes. Store in a sealed container in the fridge for up to 1 week if it lasts that long. Makes 12 large cookies.


© 2013 jordanabananabakes.blogspot.ca


Thursday, February 7, 2013


One of my favourite cafés in Toronto called La Bohème http://labohemecafe.ca/ sells wrapped Pâte de Fruit de Provence. These melt-in-your-mouth, European-style, sugar-coated fruit confections (I really don’t want to call them jellies, because to me the word conjures up gummy or hard jujube-type candies) are soft, delicious bars of concentrated fruit. And they are my husband’s favourite.

My second inspiration came from the very beautiful book Chocolates and Confections (at home with The Culinary Institute of America) by Peter P. Greweling, which gave me the confidence to tackle my first attempt at simple candy making. (Btw, if you already make jams and jellies at home, it should be even less daunting to make a slab of this sweet). The third facilitator was a candy thermometer that went on sale at Whole Foods for $2.99. I took that as a sign that I had to make it for Marcin. And I’m so happy and proud that I did! My frozen mixed berries from summer turned into dark beauties with a divine texture. If you heart fruit and want to make something different, these are quite special. Happy Valentine's Day, my love.

Pâte de Fruit

2 cups frozen fruit (mix of strawberries, blueberries, blackberries, raspberries and a few pitted cherries)
3 cups sugar
1 box (2 pouches) Certo liquid pectin (at 85ml each, have pouches open and ready to pour)
1 Tbsp lemon juice
½ cup sugar, for coating

Things needed: blender, candy thermometer

© 2013 jordanabananabakes.blogspot.ca

Oil, butter or spray with non-stick cooking spray a 9 x 13 baking pan and line well with plastic wrap, making sure to flatten it to minimize bubbles and wrinkles, especially in the corners of the pan. Do not let excess plastic drape over the pan, but allow it to stay on the inside edge. Set aside.

Cook down frozen fruit in a large saucepan on med. heat, just until its juices are flowing and no ice can be seen. Slightly cool and transfer to a blender, which is then puréed to medium-fine (take care when blending and make sure to slightly vent the lid so steam can escape).

© 2013 jordanabananabakes.blogspot.ca

Put fruit purée and sugar in the same saucepan, which is now on med. high heat. You must stir constantly (to also prevent the bottom of the saucepan from scorching) and cook the purée until the temperature reaches 238°F (the bowl you used for sugar can be where you put the candy thermometer in once the temperature reaches 238°F, or else you will end up putting the thermometer on the counter, when you have to rush to get the boiled purée in its pan).

Once it reaches 238°F, quickly add the pectin and return the mixture to a boil while stirring, for 1 minute.

Stir in lemon juice and take pan off heat (and don't forget to turn off heat).

Quickly pour hot mixture onto prepared pan and sprinkle thin layer of sugar evenly on the top.

© 2013 jordanabananabakes.blogspot.ca

Let pan completely cool (two hours or longer) on a rack.

Turn the pan upside down on a large cutting board to release jelly. Peel off plastic wrap. Sprinkle thin layer of sugar evenly on top.

© 2013 jordanabananabakes.blogspot.ca

Use small cookie cutters or cut into desired pieces and roll each piece in sugar. It is best presented the same day it's made. Extras you can store in an airtight container, between layers of plastic wrap or parchment, in a cool, dry place, but keep in mind the sugars will dissolve. The rest of the batch you can keep all to yourself, or share with those who don't mind sticky, yummy, coloured fingers.

© 2013 jordanabananabakes.blogspot.ca

Tuesday, January 22, 2013


When Dana Moos wrote her introduction to The Art of Breakfast and talked about the varied diets of her inn guests, I wondered if she ever encountered one as diverse as Yanni’s.

In my aim to please, I took up a personal challenge- to alter a new recipe for a vegan, wheat-free and blood type A diet. But perhaps in all my glorious effort to satisfy the sweet buds, our friend Yanni might not be a sweets kind of person at all. Which is o.k., because I am delighted that this recipe surfaced at the right time, when I was looking for a healthy weekend winter breakfast alternative: one that I could prepare the night before, largely portioned (for future visitors), versatile, different and down-home delicious. It’s comfort heaven if you top this breakfast cake with raisins and/or dried cranberries and pure maple syrup! Mrs. Moos’ original recipe contained dairy and is served with rhubarb sauce and vanilla crème (aside from dairy, rhubarb and alcohol-based extracts like liquid vanilla are to be avoided in type A diets, in which case vanilla seeds could be used). But for our friend (and everyone else), I think this cake would also be amazing served with a simple fruit compote, as a breakfast main or along with your buffet of brunch fixings. In the summer, maple syrup and fresh berries alongside would be lovely as well.

Mmm…summer berries! Dreaming of summer during this cold winter day! Dreaming of
Yanni and Kali’s beautiful location in the Muskokas (www.evergreenecoresort.com). Can’t wait to share this with you, dear friends, over coffee and conversation.

Vegan and Wheat-Free Oatmeal Breakfast Cake

1 cup organic canola oil
½ cup honey
¼ cup pure maple syrup
1 tsp black strap molasses
150g organic silken tofu
2 1/2 cups unsweetened almond milk
2 tsp cinnamon
1 ½ tsp salt
6 cups thick-cut organic old-fashioned rolled oats (not quick cook or instant)

For the Berry Compote: Put 2 pints fresh or frozen mixed berries in a saucepan with
½ cup orange juice and cook down at medium heat. Serve on the side.


© 2012 jordanabananabakes.blogspot.ca  

In a bowl, combine oil, honey, maple syrup and molasses. In a large bowl, toss oats with cinnamon and salt. In a large mixing bowl, mash and whisk silken tofu until slightly smooth in texture, then add the oil mixture and whisk together until smooth and well combined. Whisk in almond milk. 


© 2012 jordanabananabakes.blogspot.ca

Add the oats and mix until well incorporated.


© 2012 jordanabananabakes.blogspot.ca


Pour mixture into a greased 9 X 13 glass baking dish and use a spatula to press/spread the mixture gently and evenly throughout the baking dish. Cover (with lid or plastic wrap) and let chill overnight in the fridge.


© 2012 jordanabananabakes.blogspot.ca

Preheat oven to 350°F. Remove baking dish from fridge, uncover and let stand about 15 min. while the oven is preheating.

Bake uncovered for 30-35 minutes, until lightly brown on top. Let cool 20 minutes and cut into squares and serve with raisins and/or dried cranberries with maple syrup and/or berry compote on the side. Store in refrigerator and remains wonderful rewarmed in the microwave.


© 2012 jordanabananabakes.blogspot.ca

Adapted from The Art of Breakfast by Dana Moos